Author Archives: GCSDev

Early Spring-Blooming Perennials

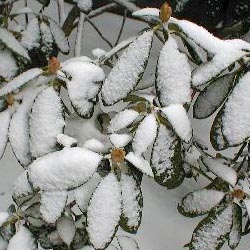
When winter is long and dreary, it can seem like your precious flowerbeds will never burst into life again. Early spring flowers, however, are precious proof that winter is on its way out, and some can even bloom in bright, cheerful colors right through lingering snow. Yet we often forget these beauties, overcome with the bold, familiar bulb displays of tulips, daffodils, hyacinths and more. This is unfortunate, because many of these perennials have a subtle charm that complements bulbs and shrubs which bloom in early spring, and they add even more variety, texture and color to your landscape.

Perennials for Early Spring Blooms

When choosing the best plants to be a stunning early spring display, the amount of sun or shade the location receives is the most critical factor for the plants’ success and the gorgeousness of their growth.

For a sunny location, opt for…

  • Sweet William (Dianthus barbatus)
  • English Daisy (Bellis perennis)
  • Mountain Pinks (Phlox subulata)
  • Rockcress (Aubrieta)
  • Candytuft (Iberis)
  • Wall Cress (Arabis)

For part to full summer shade locations…

  • Pasqueflower (Anemone pulsatilla)
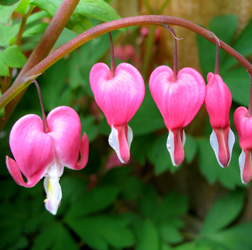
  • Bleeding Heart (Dicentra)
  • Virginia Bluebells (Mertensia)
  • Columbine (Aquilegia)
  • Dead Nettle (Lamium)
  • Forget-Me-Not (Myosotis)
  • Creeping Phlox (Phlox stolonifera)

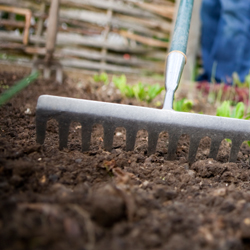
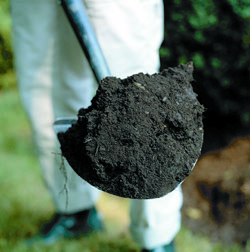
Planting Perennials for Early Spring Blooms

When you choose which early spring bloomers to add to your landscape, consider the plants’ overall mature size, soil requirements and both watering and fertilizing needs to be sure they can reach their full potential. If you choose to plant them in fall, take extra care to protect tender roots and give the plants time to thoroughly establish themselves before the first hard freeze. Good compost and mulching around the new plants can help protect and nourish them through the first winter, and they’ll be ready to burst into colorful bloom in just a few months.

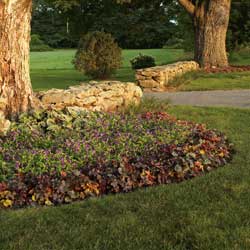
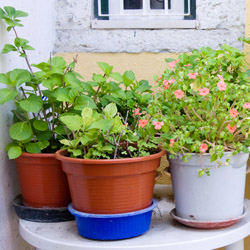
Many of these plants are good mid-level bloomers ideal for flowerbeds. They can fill in around other small accent trees and shrubs and provide a lush background for other blooms or mounding plants in front of the bed. They can fill in around trees for a more naturalized look, and can be great in borders. Just be sure to plant at least a few where you’ll have a good view of their beauty from indoors and you’ll be able to enjoy the beauty of their early blooms even if it’s a bit too cold to be outdoors in your garden!

early-spring-bloomers

Attracting Birds to Your Garden

One of the benefits of a garden is the wildlife it attracts, and birds are some of the most popular garden wildlife. Most birds are voracious eaters that are glad to keep the insect population down, and may eat 500-1,000 insects in one afternoon. This makes them ideal for natural (and free!) pest control. Anything you can do to attract birds will make your garden healthier and you’ll be entertained by their feeding antics along the way.

Fortunately, it is easy to attract birds to your garden if you meet their needs for food, shelter, water and overall habitat variety.

Food

While birds will certainly eat insects and may munch on seeds, berries and fruits in the garden, consider placing a variety of bird feeders in your garden to entice even more birds to visit. Platform feeders attract ground birds, hanging feeders are for perching birds and suet holders attract insect-eating birds. Suet is especially important during the winter as this helps birds maintain their body temperature by adding fat to their diet. Hang plastic mesh bags of suet or pinecones dipped in suet (or peanut butter) from the limbs of trees.

For your other feathered guests, white millet and black oil sunflower seeds will attract the most common seed-eating birds and can be sprinkled directly on the ground or added to feeders. Add other species-specific seed like Nyjer (thistle) seed (to attract goldfinches, pine siskins and purple finches) or peanuts (to attract chickadees, jays and tufted titmice) to your buffet. Various gourmet seed mixes are also available like Lyric Supreme, Delight, Chickadee, Woodpecker and Finch Mixes, each of which is blended with specific birds in mind and includes the foods those birds like best.

Shelter and Nesting Sites

Birds feel more secure if they have shelter to protect themselves from the weather and other predators. Plant native trees and shrubs birds will easily recognize as suitable shelter. If your landscape is young and doesn’t include much shelter for birds, don’t worry. Consider building a brush pile or adding a loose woodpile to the yard and birds will happily take advantage of it.

You may also want to add nesting boxes or bird houses and other materials for birds to raise their young. This should be done in late winter or early spring just as birds are beginning to look for nesting sites. Clean houses or boxes after each nesting season.

Water

One of the most important things to include in your bird-friendly garden is water. This is especially true during the winter months. Use a bird bath heater to keep water from freezing. Ideal water sources are 2-3 inches deep and 3 feet off the ground to keep visiting birds safer from prowling predators. Moving water is a magnet for most birds and will attract them from great distances for a drink or bath. A mister, dripper or circulating pump can be added to a bird bath or other water feature during most of the year, but take care to winterize the equipment properly so it does not freeze and break during the coldest months.

Habitat Variety

Because birds live in many different habitats, the variety of plant material you can offer in your backyard will determine how many birds are attracted to your garden. Consider native plants, plants with berries, fruits, sap and nectar for year-round food sources as well as nesting materials. Plan your landscape in tiers and flowing, connected beds so birds can move around easily, and include a variety of both deciduous and evergreen plantings so birds can find the habitat useful year-round.

We carry a complete line of bird feeders, houses, seed mixes and suets as well as garden accents; all the accessories and plants you will need to start attracting birds to your backyard. Stop by today!

atracting-bird-1

Helleborus – A Perennial for the Ages

When selecting new additions for the perennial garden it is almost impossible to find one that will provide year round interest. This difficulty is further compounded when you need a shade-loving perennial. Well, what was once considered impossible for a perennial is now possible with the Helleborus!

About Helleborus

Although there are many species of Helleborus, the most popular is the Lenten Rose (H. orientalis). Bred especially for its unusual range of color, this cultivar is a low maintenance, long blooming, shade loving, evergreen perennial.

  • Habit
    The neatly mounded form of the Lenten Rose grows approximately 12-24” high by 18-24” wide.
  • Flowers
    The nodding flowers of H. orientalis resemble a single rose and are about 2-2.5 inches across. They are available in range of colors that include white, cream, lemon, chartreuse, lime, pink, rose, maroon, plum and almost black. Many varieties can even be speckled. Flowers appear in early to mid-March, while most other perennials are still sleeping, and last well into May. This plant has the unique ability to bloom in freezing temperatures often with snow still on the ground.
  • Leaf
    The Lenten Rose boasts a large, glossy, leathery, evergreen, compound leaf. Each leaf is made up of 7-9 serrated leaflets borne at the end of the leaf stalk, producing an umbrella like effect.

Helleborus in the Landscape

This perennial works well near a walkway so that it can be easily enjoyed before the garden season even begins. Elevate the plant for a better view of the face of the nodding flowers. Use all Helleborus as specimens in a small garden or near a pond, in mass as an evergreen groundcover or to provide textural contrast in the mixed border. At home in a woodland garden, Hellebores work well with hostas, ferns, brunneras, snowdrops, pulmonarias and winter aconites. It can be attractive surrounding a tree, tucked next to a deck or in a rock garden.

Growing Helleborus

Hardy in zones 4-9, Helleborus orientalis grows best in heavy to light shade. It prefers moist, well-drained soil, rich in humus and organic material, and is pH adaptable for a wide soil range. Tolerant of summer heat and humidity, the Lenten Rose is adaptable to drier soils, and competes well with tree roots once it is established. Mulch well to retain moisture and fertilize in early spring before the flower stalks begin to lengthen. By the end of the winter, leaves can often become tattered or scorched. Simply cut off any unsightly leaves and fresh new leaves will soon replace them.

If you wish to divide H. orientalis, do so in the late summer to early fall. Make sure that you dig a generous root ball and provide plenty of water until established. The Hellebores do not like to be disturbed and are slow to recover when moved, so be gentle. Helleborus orientalis may be propagated from seed, however, seeds take six months to germinate and the young plants take three years to bloom so patience is essential – but well worthwhile for the stunning results.

Hellebores are not prone to any pest or disease, and these plants are deer resistant.  

Other Popular Hellebores

While the Lenten Rose may be the most popular of the Helleborus plants, it is not your only option. Other popular Hellebores include:

  • H. foetidus – Stinking Hellebore
    The flowers of this Hellebore are light green, and the evergreen leaves are more deeply lobed and sharply serrated than those of the Lenten Rose. The flowers of the Stinking Hellebore are said to be slightly malodorous.
  • H. niger – Christmas Rose
    Similar in appearance to the Lenten Rose, this Helleborus must be vegetatively propagated and blooms earlier in the season the Lenten Rose. It can be a great option for extending the blooming season in your shade garden.

No matter which Helleborus you would like to try, you’re sure to love the results when you add these shade-loving perennials to your landscape.

helleborus-1

Design a Raised Landscape That Works

Raised beds have been around for years, but have become increasingly popular recently because they make the landscape orderly, organized and easy to maintain. You can readily reach over and pull weeds as they appear, plant more comfortably and enjoy the new tiered depth and dimension of your lawn and garden. Raised beds are also particularly helpful if you are working with heavy soils that drain poorly, or if you have mobility limits that make getting down to ground level more difficult.

If you’re just getting started with raised beds, it’s easy to successfully bring your gardening to a higher level:

  1. Define the bed lines with a rope or hose. Consider the overall bed size, as well as the size and shape of your building material. You may want to position the bed along a fence or in a corner for more dimension and support.
  2. Dig a 4-6” deep edge along the perimeter. Don’t worry if this line isn’t as neat as you would like, because it will be more refined once you construct the bed frame.
  3. Remove existing sod/grass from the bed. You can compost the removed material, or use it to patch other spots in your lawn or turf as needed.
  4. Place concrete blocks, wall stone or other edging along this new bed line to build your bed frame. Wooden railroad ties or planks can also be used, but be aware that they may warp or decay in time. In general, stone or other sturdy materials are preferred.
  5. Build up your flower bed approximately 6-8” with top soil, mixing in peat moss for better drainage and compost, leaf mulch, cow manure or similar organic material to adequately nourish the soil.
  6. Compact your soil mixture as you build up each layer. This will help keep the bed from settling excessively as you plant and water.
  7. Increase the visual impact of your flower bed or gardening area by planting at different levels. Arrange shorter, lower growing plants in front, followed by medium and then tall plants in the back. You might consider some “spiller” plants along the sides and front if desired. Choose plants carefully to match the size of the bed, avoiding plants that will quickly outgrow the smaller, more confined space.
  8. Apply a 2-3” layer of mulch or stone and thoroughly soak your new landscape feature. Sprinkle Miracle Gro Weed Preventer or a similar product over the area to provide an invisible layer of protection against germinating weeds.

Before you know it, your new raised bed will be thriving and will quickly become the centerpiece of your landscaping. Then it’s time to construct another!

design-raised

Soil 101

How well do you understand your soil? It’s more than just dirt, and the more you learn about soil, the better you’ll be able to care for it to ensure a stunning landscape, healthy lawn and productive garden.

All About Soil

The four elements of soil are minerals, water, air and organic matter. Different combinations of the four elements create the four main categories of soil: sand, silt, clay and loam. Of course, we all want loam – that rich, vibrant soil thriving with beneficial bacteria and with a smooth but crumbly texture ideal for root growth. Unfortunately, true loam soils are rare, especially around homes where topsoil was removed and heavy machines compacted the remaining soil during construction or renovation. Most of us have clay soil, which has finer particles that compact easily into a dense mass. Clay soils also retain more water and can easily become too soggy or waterlogged for healthy plants. But just because your soil may be clay, it doesn’t have to stay that way!

Improving Soil

Improving soil is actually quite easy. All soils are improved by adding minerals and organic material that help balance out the overall components of the soil’s structure.

Before adding minerals, test the soil to determine its pH (acidity or alkalinity) and determine any mineral deficiencies. Lime decreases soil acidity, gypsum adds calcium and helps break up heavy clay and sulfur increases acidity. Other soil amendments to add to a clay soil include sand, cottonseed meal and peat moss, all of which will help improve the drainage and structure.

Organic matter refers to plant or animal materials decomposed into compost or “humus.” This residue comes from leaves and other plant materials, as well as certain animal wastes. Grass clippings, paper and certain types of decomposing food can also be ideal compost. The quality depends on the origin of the original biodegradable matter. Many people make their own compost using bins in which materials are mixed until they decompose. Others purchase finished compost. When compost is added to soil, it releases nutrients that are vital for healthy plants, and healthy bacteria and microbes will thrive in organically-rich soil.

The Magic of Mulch

Mulching is a simple way to add biodegradable materials to the soil. Evergreen needles, tree leaves, lawn clippings, chicken manure, etc., can be worked into the soil to decompose. This process improves the air spaces between the soil particles and rearranges the sand, silt and clay to produce optimum soil structure, improving the water retention and drainage balance and making nutrients available to plants.

When soil has proper structure and sufficient nutrients for healthy plants, optimum health has been achieved, and great soil will lead to great landscaping, turf and gardens. Congratulations and keep on growing!

soil_4

soil_1

soil_2

soil_3

Azaleas – An American Favorite

Azaleas are true garden favorite and are popular in all types of landscape designs. To keep them blooming prolifically and as beautiful as they can be, however, you will need to follow a few special directions for their best care.

Planting Azaleas

Azaleas need a well-drained location, as they will not thrive in an area that stays overly wet. They prefer afternoon shade, and too much sun can harm their leaves and fade the flowers, depleting their beauty. For their best growth, it is important to shelter azaleas from drying winds. The best locations in the landscape will be along the north, northeast or east side of a building or stand of evergreens or in the filtered shade under tall trees.

Azaleas may be planted any time of the year, even when in full bloom. Spring and early fall are ideal planting times so the plants are not stressed by the heaviest summer heat. Before planting, loosen the matted roots with a hand cultivator so they can spread and establish more easily.

To give azaleas the excellent drainage they require, they should be planted high, with half the root ball above the existing ground level in a hole at least twice as wide as the root ball. Amend the planting soil to provide good nutrition for these hungry plants. Once the plant is set in the planting hole, fill in around it with the planting mix, packing firmly to eliminate air pockets. Mound soil up to top of root ball. Water shrubs thoroughly with a diluted plant starter fertilizer to encourage root growth and help them establish more quickly. Mulch 2-3 inches deep over the planting hole, with mulch pulled away from plant stem to avoid insect infestations and rotting.

Watering Azaleas

Spring and summer plantings should be watered 2-3 times per week until fall the year they are planted, then once a week until Christmas. Plants may need to be watered as often as once a day if they are small or the weather is hot. Always check the soil moisture level before watering. It should be lightly moist several inches down, but if it is drying out more frequent watering may be needed. In following years you will need to water your azaleas about once a week unless there is a good soaking rain. Plants will need more water in hot summers and while in flower to keep their growth and form lush.

The Need for Mulch

Mulching around azaleas is always a good idea, and can help them thrive. A 2-4″ layer of mulch should be maintained at all times over the root area of the plant, but pulled away from the stems. This keeps the soil cool and moist, helps control weeds and protects roots in winter.

Pruning Azaleas

Azaleas rarely need to be pruned. When pruning is required it should be done immediately after blooming, since if you wait to prune until summer you may cut off next year’s blooms and miss an entire flowering season. Azaleas may be sheared, as they will send out new shoots anywhere on a branch, or you may choose hand-pruning to create a neater form.

With a bit of considerate care, azaleas can be a showstopper in your landscape. Stop by today for help choosing the best azaleas and learning all you need to know to keep them gorgeous year after year!

azaleas

Pruning Forsythia

Forsythia is a true spring favorite and never disappoints with its shocking yellow blooms atop a mass of unruly branches. This early-flowering shrub can thrive for decades on neglect but there will come a time, whether out of want or necessity, that your forsythia will require pruning. But how can you do so without dampening the ferocious spring flame these spring shrubs produce?

Why Prune Forsythia?

When this shrub does so well without detailed care, why is it necessary to prune it at all? In many landscapes, if the shrub is properly sited, it may not need pruning. Unfortunately, many people underestimate the vigorous growth of these beauties, and in just a few years it may seem crowded and overgrown in a corner, narrow bed or border. A large, unruly forsythia may also seem overwhelming in a smaller space or when paired with less vigorous plants. Damage or illness may also create a misshapen or unbalanced plant that is no longer so pleasing to the eye. In these cases, judicious pruning can rejuvenate and refresh the shrub and give new life to its part of the landscape.

Rejuvenating Forsythia

Rejuvenating an old, out of shape and poorly flowering forsythia is simple. After the shrub has finished flowering in late spring, cut all the branches back to within one foot of the ground. When branches put on new growth, reaching two feet from the ground, prune all branch tips to the first set of side shoots. This will help develop a fuller, thicker shrub for a more lush look. Be aware, however, that it will take until the second bloom season for a severely pruned forsythia to return to its former splendor.

A newer forsythia that is just a few years old can be kept in tip-top shape a bit more easily. Each spring, after it flowers, cut up to one-third of the branches back to the ground. Choose dead branches, branches thicker than your thumb and all crossed or inward facing branches. This will help create a good form with healthy air circulation and pleasing growth for years of beauty and enjoyment.

It’s easy to keep forsythia looking stunning for many years. Whether you want to make the most of the forsythia already in your yard or want to add this beauty to your landscape, stop by – our landscaping experts can help you choose the best species for your yard and needs so you can enjoy its beauty for many springs to come.

forsythia-1

Create Successful Shrubs With Proper Pruning

Gorgeous yellow, pink, red, orange, white and purple blooms put on a show in early spring from plants like forsythia, lilac, azaleas, rhododendron, mockorange, weigela and bridal wreath spirea. Summer then greets us with bold blossoms in hues of purple, magenta, blue and red from butterfly bush, hydrangea, crape myrtle and rose-of-sharon. These deciduous shrubs provide a beautiful backdrop for the garden and most of these plants only require basic watering, fertilizing and pruning. Why not add them to your yard today?

More Blooms, Better Blooms

To keep your shrubs healthy and blooming prolifically, it is important to know which plants to prune at what times. Before you go chopping away, do a little research about when your shrub should be pruned. If you don’t do it at the right time, you won’t get many (or any) of those gorgeous flowers to enjoy.

Shrubs to Prune When Dormant

Shrubs that produce flowers on wood grown in the same season should be pruned in late winter or very early spring. This allows time for the wood to grow and the current year’s buds to set to produce more beautiful blooms the next year.

  • Abelia
  • Beautyberry (Callicarpa)
  • Bluebeard (Caryopteris)
  • Butterfly Bush (Buddleia – except Alternifolia)
  • Cinquefoil (Potentilla)
  • Crape Myrtle (Lagerstroemia)
  • Hydrangea (Paniculata and Arborescens)
  • Rose
  • Rose of Sharon (Hibiscus)
  • Spirea (all species that bloom in summer)

Shrubs to Prune Immediately After Flowering

Shrubs that bloom on year-old wood and need to be pruned just after blooms fade. This allows enough time for the new branches to form next year’s buds.

  • Azalea
  • Barberry (Berberis)
  • Beautybush (Kolkwitzia)
  • Heather (Calluna)
  • Daphne
  • Deutzia
  • Forsythia
  • Honeysuckle (Lonicera)
  • Hydrangea (Macrophylla, Seratta and Quercifolia)
  • Kerria
  • Lilac (Syringa)
  • Mock Orange (Philadelphus)
  • Pieris
  • Rhododendron
  • Scotch Broom (Cytisus)
  • Spirea (spring blooming varieties like bridal wreath)
  • Weigela
  • Witch Hazel (Hamamelis)

Still Not Getting Any or Many Blooms?

Even with proper pruning, it is possible you may not be seeing the blooms you’d hoped for. Some routine maintenance will help keep your plants healthy so they can produce those fantastic flowers.

If you haven’t already done so, fertilize plants this spring with Plant-Tone, Holly-Tone or similar products (for those acid-loving azaleas and rhododendron). Move the mulch and sprinkle the food lightly over the soil at the outer edges of the plant, then water well. Replace the layer of mulch to help conserve moisture and prevent most weed growth.

Though an established shrub can endure a moderate drought, it will flower more reliably if you help it through the dry weather with a weekly watering. Consider a drip system to provide good water and minimize evaporation.

Other reasons your shrub may not be putting on its best flower show might include improper lighting or incorrect soil conditions. Similarly, if a plant does not receive enough sunlight or if the soil pH isn’t suitable for that type of plant, it will not flower as it should.

If you’re having trouble with a particular plant, stop by or call us to help you find out why. And, remember, sometimes it just takes patience. Some plants, like wisteria, can take up to seven years to produce flowers, but will be well worth the wait for the amazing show they produce.

shrub-prune-2

shrub-prune-1

Dealing With Winter Damage

It’s early spring – time to survey the damage that winter has produced. In some areas, shrubs may still be hiding under piles of frozen snow, and could be crushed or compacted. Severed tree limbs may lie scattered across the landscape, and bark may be torn and stripped from trunks. It’s difficult to know what to tackle first, but fortunately, much of the damage is easily correctible.

Repairing Winter-Damaged Trees

When surveying and repairing winter damage, start with your trees – they are generally the most valuable additions to your property. As you survey the damage – broken limbs, torn bark, a tilting trunk – ask yourself “Is this tree salvageable or should it be removed?” If the damage is extensive, or you are unsure about how the damage may affect the tree’s overall health or future growth, hire a professional for a consultation. Replacing a severely damaged tree with a younger one, perhaps a type you like even better, may be the best solution.

If a limb is broken somewhere along its length, or damaged beyond repair, employ good pruning practices and saw off the remaining piece at the branch collar, being careful not to cut into the trunk or leave a stub. Sometimes a fallen limb may strip bark off the tree trunk. To repair this damage, cut the ragged edges of the loose bark away from the stripped area to firmly affixed healthy bark. Nature will take care of the rest. Even if the trunk of the tree is split, the tree may still be saved. For large trees, repairing this type of damage usually requires cabling and bracing done by a professional. If the tree is still young, the crotch may be pulled tightly together and tied or taped until the wound eventually heals.

Repairing Winter-Damaged Shrubs

Shrubs can suffer the same damage as trees, including broken limbs and stripped bark. Heavy snowfall can crush smaller shrubs, and larger varieties may have their trunks or centers split from heavy snow or ice accumulation. Most shrubs are resilient, however, and slowly regain their shape as the weather warms. If branches are bent but not broken, you may tie them together to help them along and prevent further damage from late-season storms. Do not tie tightly and remove twine after about a year. Completely broken branches may be pruned away, but take care to maintain the shrub’s form and balance, keeping in mind its growth pattern so it will not look lopsided or ungainly. Again, if the damage is severe, you may need to replace the plant.

The harder the winter is, the more of a beating trees and shrubs will take. With prompt attention in early spring, however, you can easily undo much of the damage and help your landscape recover with ease.

damage_1damage_2

Why Lime?

Fertilizers can’t do the whole job of keeping your lawn healthy and beautiful because they can’t raise the pH of acidic soil. Poor lawns are often the result of acidic soil. Lime is an excellent way to correct low soil pH. Fall is the best time for liming your lawn because the soil expands and contracts as the temperature fluctuates during the winter months. This motion works the lime into the soil. Also, the increase of moisture during the fall and winter helps “percolate” the ground and coats the soil with lime particles.

Lime comes in three forms: pulverized, which is a fast-acting powder recommended for the garden; granular, which is sugar-textured and dust-free; and pelletized, which is fast-acting and dust free.  Granular and pelletized forms can be applied to the lawn with a drop or rotary spreader.  Application rates for the different types of soil are listed right on the back of the product bag.  Generally, fifty pounds of lime per thousand square feet will raise the pH ½ of a point.

How do soils become acidic?  Over the years, calcium and magnesium, the alkaline components in the soil, become replaced by hydrogen and are lost in drainage water.  Also, while nitrogen is essential for good growth of grass, heavy applications make the soil more acidic.  Not only does lime correct the acidity of the soil by reducing the toxic amounts of aluminum, manganese and iron, but it also supplies calcium and magnesium, which are essential for plant growth.  Other benefits of applying lime include less leaching of potassium, making phosphorus more available and speeding the decomposition of organic matter in the soil for reuse by the plant.

How can you find out if your soil is too acidic? Bring in a soil sample, ½ cup taken from a depth of 6 inches, for a free pH test or, for a complete analysis of your soil, contact your county agent for a Soil Test Kit.

Repotting Houseplants

Fall is an excellent time to repot many houseplants. Potted plants that have been growing outdoors during the summer have probably grown quite vigorously due to the high light levels and greater humidity. If the top growth of the plant has increased in size by 20 percent or more, it probably should be transplanted into a larger container so the roots can stretch and settle comfortably.

Before You Repot

Before repotting, check the plant and the soil carefully for insects.  Add systemic granules to the soil and spray the leaves with an insecticidal soap to remove any unwanted pests. If an insect infestation is particularly bad, it may be necessary to remove most of the plant’s soil and replace it with fresh potting soil. Avoid using soil from the garden, however, which will harbor insect larvae and eggs as well as weed seeds and other material you do not want in your houseplants.

Acclimating Plants

Bring your plants indoors well before any danger of frost for proper acclimation to the indoor environment. The change in light levels and humidity could shock more delicate plants, and they may wilt temporarily or drop leaves before they adjust to the new conditions. If possible, bring them in just a few minutes at a time for several days, gradually increasing their indoor time to several hours before keeping them indoors all the time. Flowering tropicals will also benefit from cutting back some of their foliage to avoid shock before being brought indoors.

To help houseplants overcome the transition from outdoors to indoors, position them in a bright, sunny area and consider adjusting indoor temperature and humidity controls to more closely mimic outdoor conditions. Make adjustments slowly and gradually, and the plants will adjust.

Time to Repot

Once your houseplants are adjusted to their indoor fall and winter environment, they can be safely repotted without adding to their stress. Repot the plants early in the day, and move them to a slightly larger pot. Avoid jumping several pot sizes, which could lead to excessive root growth while the foliage is neglected. Be sure to fertilize and water the plants appropriately to provide them proper nourishment as they settle into new pots. Do not expect luxuriant foliage growth right away, however, as it will take some time for the plants to begin growing again, especially in fall and winter when most houseplants are entering a dormant, slow growth period.

By repotting your houseplants in fall, you can help healthy, vigorously growing plants adjust to a new environment and continue their growth with ease in a new, larger, more comfortable pot.

Repotting_1

Birdscaping

As wildlife habitats are threatened by development, the creation of a bird-friendly environment that provides food, water and shelter is crucial to the existence of our wild bird population. Caring for our feathered-friends is an educational and enjoyable activity for the entire family that brings beauty and song to our lives.

Benefits of Wild Birds

Birds are great guests to have in your yard, garden or landscape, and they provide more benefits than many homeowners and gardeners realize. Wild birds can…

  • Control insects by feasting on both flying and crawling insects, as well as spiders, slugs, snails and other creepy-crawlies.
  • Pollinate plants by flitting from flower to flower as they seek out insects or eat seeds, taking pollen along between blooms.
  • Manage weeds as they consume copious amounts of weed seeds before the seeds ever have a chance to sprout.
  • Control rodents when raptors visit the yard in search of mice, rats, gophers, voles or other unwanted pests.

Attracting Backyard Birds

Fortunately, it is easy to attract a wide variety of backyard birds when you offer them what they need most – food, water and shelter.

Food for Birds

Wild birds rely on both natural and supplemental food supplies so it is important to consider both when birdscaping. Feeding the birds is most important in the winter when natural food is scarcer, but they will visit feeders at any time of year. Migratory birds require additional food in the spring and fall as they pass through the region and nesting birds will utilize feeders in the summer.

Tips:

  • Provide a variety of natural foods for birds by planting berry bushes, seed-bearing flowers, nectar-rich flowers and sunflowers. Leave windfall fruit on the ground for birds to nibble. Minimize pesticide use so birds can feast on insects as well.
  • Add supplemental feeders to your yard, such as birdseed feeders, suet feeders and nectar feeders. Clean feeders weekly to avoid mold that can be dangerous to birds, and be sure feeders are full when birds need them most.

Water

Improve your backyard bird habitat by adding water. Birds require a constant supply of clean water for drinking and bathing. This is especially important in late summer, when water is scarce, and in the winter, when it is frequently frozen.

Tips:

  • Place bird baths in a protected location safe from predators, and keep the baths filled at all times so a fresh supply of water is constantly available.
  • Scrub off algae as soon as it is appears and thoroughly was the bird bath each week to minimize feces contamination or other messes in the water.
  • Provide motion for greater attraction by using a bubbler, wiggler, dripper or fountain. Birds will see the sparkles of the moving water and will hear the splashes from great distances, so more birds will visit.
  • Use Mosquito Dunks to safely prevent mosquito larvae in warm weather. A clean bird bath with moving water will also harbor fewer insects.
  • Add an outdoor-safe submersible heater to the bath in winter to keep the water liquid instead of frozen, or consider using a fully heated bird bath during the coldest months.

Shelter

It is important to offer safe and comfortable shelter for your wild birds to nurture their young, protect them from predators and shield them from the elements. Planting evergreen trees and shrubs and providing bird houses, along with roosting boxes and pockets, are all beneficial additions to your birdscape.

Tips:

  • Choose both deciduous and evergreen landscaping trees and shrubs to offer birds different types of shelter in all seasons.
  • Minimize pruning to give birds denser, more secure shelter to take advantage of when they feel threatened.
  • Plant in layers and create thicket-like pockets or corridors in your landscape so birds can move around freely without feeling exposed.
  • Supplement the shelter in your yard with good quality bird houses, winter roost boxes or nesting pockets to give birds even more options to stay safe and secure.

When you meet birds’ needs for food, water and shelter, your birdscape will soon be home to a fun and friendly flock of backyard birds.

Birdscaping_3

Birdscaping_1

Birdscaping_2