Monthly Archives: April 2017

Soil 101

How well do you understand your soil? It’s more than just dirt, and the more you learn about soil, the better you’ll be able to care for it to ensure a stunning landscape, healthy lawn and productive garden.

All About Soil

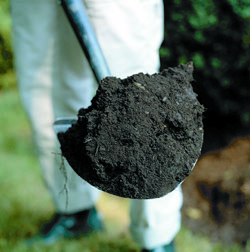
The four elements of soil are minerals, water, air and organic matter. Different combinations of the four elements create the four main categories of soil: sand, silt, clay and loam. Of course, we all want loam – that rich, vibrant soil thriving with beneficial bacteria and with a smooth but crumbly texture ideal for root growth. Unfortunately, true loam soils are rare, especially around homes where topsoil was removed and heavy machines compacted the remaining soil during construction or renovation. Most of us have clay soil, which has finer particles that compact easily into a dense mass. Clay soils also retain more water and can easily become too soggy or waterlogged for healthy plants. But just because your soil may be clay, it doesn’t have to stay that way!

Improving Soil

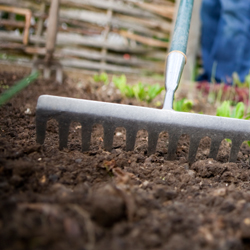
Improving soil is actually quite easy. All soils are improved by adding minerals and organic material that help balance out the overall components of the soil’s structure.

Before adding minerals, test the soil to determine its pH (acidity or alkalinity) and determine any mineral deficiencies. Lime decreases soil acidity, gypsum adds calcium and helps break up heavy clay and sulfur increases acidity. Other soil amendments to add to a clay soil include sand, cottonseed meal and peat moss, all of which will help improve the drainage and structure.

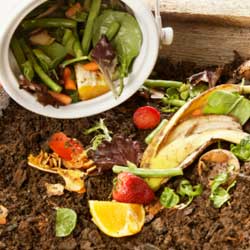
Organic matter refers to plant or animal materials decomposed into compost or “humus.” This residue comes from leaves and other plant materials, as well as certain animal wastes. Grass clippings, paper and certain types of decomposing food can also be ideal compost. The quality depends on the origin of the original biodegradable matter. Many people make their own compost using bins in which materials are mixed until they decompose. Others purchase finished compost. When compost is added to soil, it releases nutrients that are vital for healthy plants, and healthy bacteria and microbes will thrive in organically-rich soil.
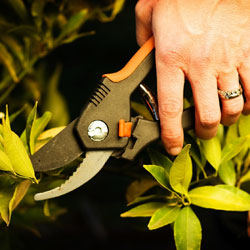
The Magic of Mulch

Mulching is a simple way to add biodegradable materials to the soil. Evergreen needles, tree leaves, lawn clippings, chicken manure, etc., can be worked into the soil to decompose. This process improves the air spaces between the soil particles and rearranges the sand, silt and clay to produce optimum soil structure, improving the water retention and drainage balance and making nutrients available to plants.

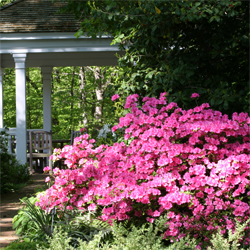
When soil has proper structure and sufficient nutrients for healthy plants, optimum health has been achieved, and great soil will lead to great landscaping, turf and gardens. Congratulations and keep on growing!

soil_4

soil_1

soil_2

soil_3

Pruning Forsythia

Forsythia is a true spring favorite and never disappoints with its shocking yellow blooms atop a mass of unruly branches. This early-flowering shrub can thrive for decades on neglect but there will come a time, whether out of want or necessity, that your forsythia will require pruning. But how can you do so without dampening the ferocious spring flame these spring shrubs produce?

Why Prune Forsythia?

When this shrub does so well without detailed care, why is it necessary to prune it at all? In many landscapes, if the shrub is properly sited, it may not need pruning. Unfortunately, many people underestimate the vigorous growth of these beauties, and in just a few years it may seem crowded and overgrown in a corner, narrow bed or border. A large, unruly forsythia may also seem overwhelming in a smaller space or when paired with less vigorous plants. Damage or illness may also create a misshapen or unbalanced plant that is no longer so pleasing to the eye. In these cases, judicious pruning can rejuvenate and refresh the shrub and give new life to its part of the landscape.

Rejuvenating Forsythia

Rejuvenating an old, out of shape and poorly flowering forsythia is simple. After the shrub has finished flowering in late spring, cut all the branches back to within one foot of the ground. When branches put on new growth, reaching two feet from the ground, prune all branch tips to the first set of side shoots. This will help develop a fuller, thicker shrub for a more lush look. Be aware, however, that it will take until the second bloom season for a severely pruned forsythia to return to its former splendor.

A newer forsythia that is just a few years old can be kept in tip-top shape a bit more easily. Each spring, after it flowers, cut up to one-third of the branches back to the ground. Choose dead branches, branches thicker than your thumb and all crossed or inward facing branches. This will help create a good form with healthy air circulation and pleasing growth for years of beauty and enjoyment.

It’s easy to keep forsythia looking stunning for many years. Whether you want to make the most of the forsythia already in your yard or want to add this beauty to your landscape, stop by – our landscaping experts can help you choose the best species for your yard and needs so you can enjoy its beauty for many springs to come.

forsythia-1

Azaleas – An American Favorite

Azaleas are true garden favorite and are popular in all types of landscape designs. To keep them blooming prolifically and as beautiful as they can be, however, you will need to follow a few special directions for their best care.

Planting Azaleas

Azaleas need a well-drained location, as they will not thrive in an area that stays overly wet. They prefer afternoon shade, and too much sun can harm their leaves and fade the flowers, depleting their beauty. For their best growth, it is important to shelter azaleas from drying winds. The best locations in the landscape will be along the north, northeast or east side of a building or stand of evergreens or in the filtered shade under tall trees.

Azaleas may be planted any time of the year, even when in full bloom. Spring and early fall are ideal planting times so the plants are not stressed by the heaviest summer heat. Before planting, loosen the matted roots with a hand cultivator so they can spread and establish more easily.

To give azaleas the excellent drainage they require, they should be planted high, with half the root ball above the existing ground level in a hole at least twice as wide as the root ball. Amend the planting soil to provide good nutrition for these hungry plants. Once the plant is set in the planting hole, fill in around it with the planting mix, packing firmly to eliminate air pockets. Mound soil up to top of root ball. Water shrubs thoroughly with a diluted plant starter fertilizer to encourage root growth and help them establish more quickly. Mulch 2-3 inches deep over the planting hole, with mulch pulled away from plant stem to avoid insect infestations and rotting.

Watering Azaleas

Spring and summer plantings should be watered 2-3 times per week until fall the year they are planted, then once a week until Christmas. Plants may need to be watered as often as once a day if they are small or the weather is hot. Always check the soil moisture level before watering. It should be lightly moist several inches down, but if it is drying out more frequent watering may be needed. In following years you will need to water your azaleas about once a week unless there is a good soaking rain. Plants will need more water in hot summers and while in flower to keep their growth and form lush.

The Need for Mulch

Mulching around azaleas is always a good idea, and can help them thrive. A 2-4″ layer of mulch should be maintained at all times over the root area of the plant, but pulled away from the stems. This keeps the soil cool and moist, helps control weeds and protects roots in winter.

Pruning Azaleas

Azaleas rarely need to be pruned. When pruning is required it should be done immediately after blooming, since if you wait to prune until summer you may cut off next year’s blooms and miss an entire flowering season. Azaleas may be sheared, as they will send out new shoots anywhere on a branch, or you may choose hand-pruning to create a neater form.

With a bit of considerate care, azaleas can be a showstopper in your landscape. Stop by today for help choosing the best azaleas and learning all you need to know to keep them gorgeous year after year!

azaleas

Create Successful Shrubs With Proper Pruning

Gorgeous yellow, pink, red, orange, white and purple blooms put on a show in early spring from plants like forsythia, lilac, azaleas, rhododendron, mockorange, weigela and bridal wreath spirea. Summer then greets us with bold blossoms in hues of purple, magenta, blue and red from butterfly bush, hydrangea, crape myrtle and rose-of-sharon. These deciduous shrubs provide a beautiful backdrop for the garden and most of these plants only require basic watering, fertilizing and pruning. Why not add them to your yard today?

More Blooms, Better Blooms

To keep your shrubs healthy and blooming prolifically, it is important to know which plants to prune at what times. Before you go chopping away, do a little research about when your shrub should be pruned. If you don’t do it at the right time, you won’t get many (or any) of those gorgeous flowers to enjoy.

Shrubs to Prune When Dormant

Shrubs that produce flowers on wood grown in the same season should be pruned in late winter or very early spring. This allows time for the wood to grow and the current year’s buds to set to produce more beautiful blooms the next year.

  • Abelia
  • Beautyberry (Callicarpa)
  • Bluebeard (Caryopteris)
  • Butterfly Bush (Buddleia – except Alternifolia)
  • Cinquefoil (Potentilla)
  • Crape Myrtle (Lagerstroemia)
  • Hydrangea (Paniculata and Arborescens)
  • Rose
  • Rose of Sharon (Hibiscus)
  • Spirea (all species that bloom in summer)

Shrubs to Prune Immediately After Flowering

Shrubs that bloom on year-old wood and need to be pruned just after blooms fade. This allows enough time for the new branches to form next year’s buds.

  • Azalea
  • Barberry (Berberis)
  • Beautybush (Kolkwitzia)
  • Heather (Calluna)
  • Daphne
  • Deutzia
  • Forsythia
  • Honeysuckle (Lonicera)
  • Hydrangea (Macrophylla, Seratta and Quercifolia)
  • Kerria
  • Lilac (Syringa)
  • Mock Orange (Philadelphus)
  • Pieris
  • Rhododendron
  • Scotch Broom (Cytisus)
  • Spirea (spring blooming varieties like bridal wreath)
  • Weigela
  • Witch Hazel (Hamamelis)

Still Not Getting Any or Many Blooms?

Even with proper pruning, it is possible you may not be seeing the blooms you’d hoped for. Some routine maintenance will help keep your plants healthy so they can produce those fantastic flowers.

If you haven’t already done so, fertilize plants this spring with Plant-Tone, Holly-Tone or similar products (for those acid-loving azaleas and rhododendron). Move the mulch and sprinkle the food lightly over the soil at the outer edges of the plant, then water well. Replace the layer of mulch to help conserve moisture and prevent most weed growth.

Though an established shrub can endure a moderate drought, it will flower more reliably if you help it through the dry weather with a weekly watering. Consider a drip system to provide good water and minimize evaporation.

Other reasons your shrub may not be putting on its best flower show might include improper lighting or incorrect soil conditions. Similarly, if a plant does not receive enough sunlight or if the soil pH isn’t suitable for that type of plant, it will not flower as it should.

If you’re having trouble with a particular plant, stop by or call us to help you find out why. And, remember, sometimes it just takes patience. Some plants, like wisteria, can take up to seven years to produce flowers, but will be well worth the wait for the amazing show they produce.

shrub-prune-2

shrub-prune-1